


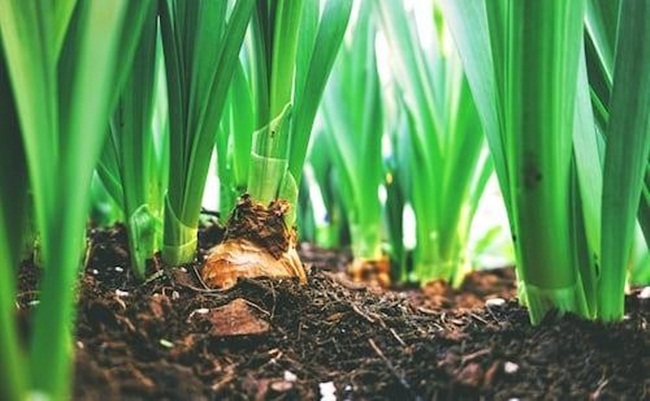
The key to successful bulb planting is layering.
One unusual thing about bulbs is that you see them in the Spring but can only plant them during Autumn. So how do you make sure your display is early and long-lasting? What can you do to get a lot of bulbs in one location?
The key to successful bulb planting is layering. Different bulbs will bloom at different times, so by layering them, you can have a display that lasts for weeks or even months. You can purchase various flowers on Florium and create bulb layering combinations to your liking.
The natural world is wonderfully diverse. Spring flowers come in every rainbow color and have a huge variety of shapes and sizes. You can have displays that are all one color or go for a riot of colors.
One thing that is the same for all bulbs though is that they need well-drained soil. They also like to be in full sun or at least a location that gets six hours of sunlight a day. Before you start layering bulbs, it’s a good idea to take a soil test. This will tell you the pH of your soil and whether it needs to be adjusted. Most bulbs like soil that is on the acidic side, with a pH of 6.5 or below.
Amending your soil with compost or other organic matter is also a good idea. This will help improve drainage and ensure your bulbs have the nutrients they need to grow.
How to layer flower bulbs
Once you’ve got your soil ready, it’s time to start layering your bulbs. The general rule of thumb is to plant the largest bulbs first, followed by the smaller ones. This is because the larger bulbs will need deeper holes, and the smaller bulbs can be planted on top of them.
When you’re planting, it’s a good idea to add a handful of bulb food or bone meal to each hole. This will give your bulbs a boost as they start to grow. Water your bulbs after planting, and then cover the area with a layer of mulch. This will help protect your bulbs from the cold and keep the weeds down.
As your bulbs start to grow in the spring, you can add more color to your display by planting annual flowers around them. This will fill in any gaps and give you a beautiful display that will last all season long. Next year, you can layer bulbs and perennials to create new flower beds.
Bulbs layering in containers
If you want to have color in your containers from early spring until fall, planting bulbs in pots in layers is the way to go. Start with the largest and deepest-rooted plants on the bottom and work your way up to the smaller, more delicate ones on top.
This not only makes for a more attractive and diverse container garden but also helps ensure that each plant gets the root space, light, and water it needs.
When you’re layering plants in containers, there are a few things to keep in mind.
- First, make sure that the container has drainage holes. Otherwise, your plants will quickly become waterlogged and could die.
- Second, use a light, well-drained potting mix. A soil-based mix will be too heavy and could cause your plants to become waterlogged.
- Third, start with the largest and deepest-rooted plants on the bottom. These will need the most space and will be better able to tolerate being in a container.
- Fourth, make sure that each plant has room to grow. Don’t overcrowd your container or the plants will compete for space and light.
- Fifth, water your container garden regularly. This is especially important in the summer when the sun is shining and the temperatures are hot.
Once you’ve got your container garden all set up, you can enjoy the color and beauty of your plants all season long.
Aftercare for your bulbs
Once your bulbs have flowered, it’s crucial to give them the right aftercare to ensure they flower again next year. The first step is to deadhead the flowers. This means removing the spent blossoms so that the plant can put its energy into producing seeds.
To deadhead your bulbs, simply cut off the flower stalk at the base. You can also remove the entire flower head, but this isn’t necessary.
Once your bulbs have flowered, they will start to form seed pods. These need to be removed so that the plant doesn’t put its energy into producing seeds. To remove the seed pods, simply cut them off with a sharp knife.
After the flowering period is over, you can cut back the leaves of your bulbs. This will help to tidy up the plant and also allow more light and air to reach the bulb so that it can start to form next year’s flower.
In conclusion
Now that you know how to layer your bulbs, it’s time to get planting! By following these tips, you’ll be able to create a beautiful display that will last for weeks or even months. So get out there and start bulb layering!